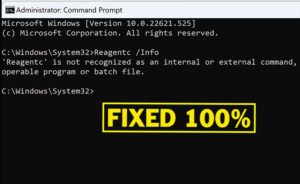
The “ReagentC is not recognized as an internal or external command” error can be frustrating, particularly when you’re trying to manage Windows Recovery Environment (WinRE) settings or troubleshoot system issues. This comprehensive guide will walk you through multiple proven solutions to resolve this problem and restore ReagentC functionality on your Windows 10 or Windows 11 system.
Understanding the ReagentC Error
The ReagentC error typically occurs in specific scenarios. ReagentC is a command-line tool that manages the Windows Recovery Environment, allowing you to enable, disable, or configure recovery options. This error usually happens when:
- Running ReagentC commands within Windows Recovery Environment (WinRE) or Windows Preinstallation Environment (WinPE), since ReagentC.exe is not included in these environments by default
- The ReagentC.exe file is missing or corrupted on your system
- You’re using incorrect command syntax
- Command Prompt lacks the necessary administrator privileges
Understanding the root cause of your error is essential for applying the correct solution. Let’s explore the different scenarios and their fixes.
Solution 1: Fix ReagentC Error in Windows Recovery Environment (WinRE)
If you’re encountering the ReagentC error while working in Windows Recovery Environment, the most efficient solution is to redirect the Command Prompt to the System32 folder of your installed Windows partition.
Step-by-Step Instructions:
- Open Command Prompt in WinRE: Boot into Windows Recovery Environment and select “Troubleshoot” → “Advanced Options” → “Command Prompt”
- Run BCDEdit to identify your Windows partition: Execute the following command to view boot configuration details:
BCDEDIT -V /EnumThis will display information about your Windows installation and help you identify the correct drive letter.
- Navigate to the Windows System32 folder: Use this command to change the directory to your Windows partition’s System32 folder. Replace “C:” with your actual Windows partition letter if different:
CD /D C:\Windows\System32The “/D” parameter allows you to switch between drives if necessary.
- Test the ReagentC command: Now run the basic ReagentC command to verify it’s working:
ReagentC /infoIf successful, you should see the WinRE status and configuration details displayed.
Enabling WinRE with Specific OS GUID:
If you need to enable WinRE from the recovery environment, the standard ReagentC /enable command may fail unless you specify your Windows OS GUID. Follow these additional steps:
- Retrieve your Windows OS GUID: Run the following command again to display detailed boot information:
BCDEDIT -V /EnumLocate the “identifier” value under your Windows OS entry. This is your unique OS GUID (it will look similar to {00000000-0000-0000-0000-000000000000}).
- Enable WinRE with the GUID: Copy your actual GUID and execute this command, replacing the example GUID with yours:
ReagentC /enable /OSGUID {00000000-0000-0000-0000-000000000000}This command specifically targets your Windows installation for WinRE enablement.
- Verify the operation: Run ReagentC /info again to confirm that WinRE is now enabled.
Solution 2: Fix ReagentC Error in Normal Windows
When the ReagentC error appears while running Windows normally, the issue typically stems from a missing, corrupted, or misnamed file. This section covers several approaches to resolve this problem.
Step 1: Verify Command Syntax and Spelling
Before proceeding with advanced solutions, ensure you’re typing the command correctly. Common mistakes include:
- Misspelling “ReagentC” as “ReagentC” or “Reagent”
- Using incorrect command switches (parameters should be preceded by forward slashes: /)
- Forgetting required parameters for specific operations
Common ReagentC command formats:
ReagentC /info
ReagentC /enable
ReagentC /disable
Step 2: Verify ReagentC.exe File Existence
Check whether the ReagentC.exe file exists on your system:
- Open Command Prompt as Administrator: Press Windows + X and select “Command Prompt (Admin)” or “Windows PowerShell (Admin)”
- Search for ReagentC.exe: Run this command to locate the file:
DIR /A /S C:\Windows\System32\ReagentC.exeIf the file is found, the system will display its location. If no results appear, the file is missing and needs to be restored.
Step 3: Run System File Checker (SFC)
The System File Checker utility can repair corrupted or missing Windows system files, including ReagentC.exe:
- Open Command Prompt as Administrator
- Run the SFC scan:
SFC /ScanNowThis command scans all protected system files and automatically repairs any found issues. The process may take 10-15 minutes to complete.
- Restart your computer when the scan finishes and the repairs are applied.
- Test ReagentC: Open Command Prompt again and try your ReagentC command.
Step 4: Run DISM to Repair Windows Image
The Deployment Image Servicing and Management (DISM) tool can restore Windows system integrity:
- Open Command Prompt as Administrator
- Execute the DISM repair command:
DISM /Online /Cleanup-Image /RestoreHealthThis command scans and repairs the Windows system image. It requires an internet connection and may take 15-20 minutes.
- Wait for completion and then restart your system.
- Run SFC again: For optimal results, run the SFC command after DISM completes:
FC /ScanNow
Read this topic to see how to run both SFC and DISM automatically.
Step 5: Install Windows Updates
Sometimes missing system files result from incomplete or failed Windows updates. Ensuring your system is fully updated can resolve these issues:
- Press Windows + I to open Settings
- Navigate to “Update & Security” (Windows 10) or “System” → “Windows Update” (Windows 11)
- Click “Check for updates”
- Install all available updates and restart when prompted
- Repeat until no updates remain
Step 6: Manually Extract ReagentC.exe from Windows ISO
If system repair tools don’t restore the file, you can manually extract ReagentC.exe from the official Windows installation media:
What You’ll Need:
- 7-Zip (free tool available at 7-zip.org)
- Windows 10 or Windows 11 ISO file matching your system version
- Administrator command prompt access
Extraction Process:
- Download and install 7-Zip: Visit 7-zip.org and download the latest version. Follow standard installation procedures.
- Download Windows ISO: Obtain the official Windows ISO matching your version and build number from Microsoft’s official sources.
- Mount the ISO file: Right-click the ISO file and select “Mount” (Windows 10/11 have built-in ISO mounting). Note the drive letter assigned (e.g., G:).
- Open Command Prompt as Administrator
- Add 7-Zip to system PATH:
set PATH=%PATH%;C:\Program Files\7-Zip\This command allows you to run 7-Zip commands from any location.
- Extract ReagentC.exe: Replace “G:” with your ISO’s actual drive letter:
7z e "G:\sources\install.wim" -o"C:\Windows\System32" -i!6\Windows\System32\ReagentC.exe -yThis command extracts ReagentC.exe directly to your System32 folder.
- Verify extraction: Check that the file was successfully extracted:
DIR C:\Windows\System32\ReagentC.exe - Test ReagentC: Run your ReagentC command to verify it now works properly.
Step 7: Resolve “Entry Point Not Found” Error
If you receive an “reagentc.exe the entry point not found” error after manual extraction, this indicates that the extracted file may still have corrupted components. Run the SFC scan again:
- Open Command Prompt as Administrator
- Run SFC:
SFC /ScanNow - Restart your system and test ReagentC again.
Step 8: Perform In-Place Repair Upgrade
If none of the above solutions work, an in-place repair upgrade reinstalls Windows while preserving your files and applications:
- Download Windows ISO: Get the latest ISO matching your Windows version from the official Microsoft website (Windows 10 or Windows 11).
- Mount or burn the ISO to a USB drive using tools like Windows 10 Media Creation Tool or Rufus.
- Boot from the installation media and select “Repair your computer” when the setup screen appears.
- Choose “Troubleshoot” and then select “Keep my files” for an in-place upgrade.
- Follow the wizard to complete the repair installation.
- Test ReagentC after the system restarts and the repair completes.
Video Guide
For a visual demonstration of these solutions, watch the detailed walkthrough below. This video covers the most effective methods to resolve the ReagentC error in both Windows Recovery Environment and normal Windows operation:
Troubleshooting Common Issues
ReagentC Command Works in WinRE but Not in Normal Windows
This discrepancy usually indicates that the ReagentC.exe file has been moved, deleted, or corrupted after being successfully accessed in recovery mode. Use the manual extraction method (Step 6) or run the SFC command to restore the file.
DISM Command Fails to Complete
If DISM encounters errors, ensure:
- You’re running Command Prompt with administrator privileges
- Your internet connection is active and stable
- Windows Update service is running properly
- You have sufficient free disk space (at least 3-5 GB)
7-Zip Extraction Returns No Results
Verify that:
- The ISO drive letter in the command matches your actual mounted ISO letter
- You’re using the correct Windows ISO version for your system
- The install.wim file exists in the ISO’s sources folder
- 7-Zip is properly installed and added to the system PATH
Prevention Tips
To avoid ReagentC errors in the future, consider these best practices:
- Keep Windows Updated: Install all available Windows updates promptly to prevent file corruption.
- Use Antivirus Protection: Malware can delete or corrupt system files. Maintain updated antivirus software.
- Avoid Manual System32 Modifications: Never manually delete or move files from the System32 folder unless absolutely necessary.
- Enable System File Protection: Windows’ built-in protection monitors System32 integrity and helps prevent accidental damage.
- Create System Backups: Regular backups allow you to restore your system quickly if critical files become corrupted.
When to Seek Professional Help
If you’ve attempted all the solutions above and continue to experience issues, consider:
- Consulting Microsoft Support through official channels
- Contacting a professional IT technician
- Performing a clean Windows installation as a last resort
Conclusion
The “ReagentC is not recognized” error, while frustrating, can typically be resolved through the systematic approaches outlined in this guide. Whether you’re working in Windows Recovery Environment or normal Windows, you now have multiple proven solutions to restore ReagentC functionality. Start with the simplest solutions—verifying command syntax and file existence—before progressing to more advanced repair methods. Most users successfully resolve this issue using either the SFC repair or manual file extraction techniques. Remember to maintain your system with regular updates and backups to prevent similar issues in the future.