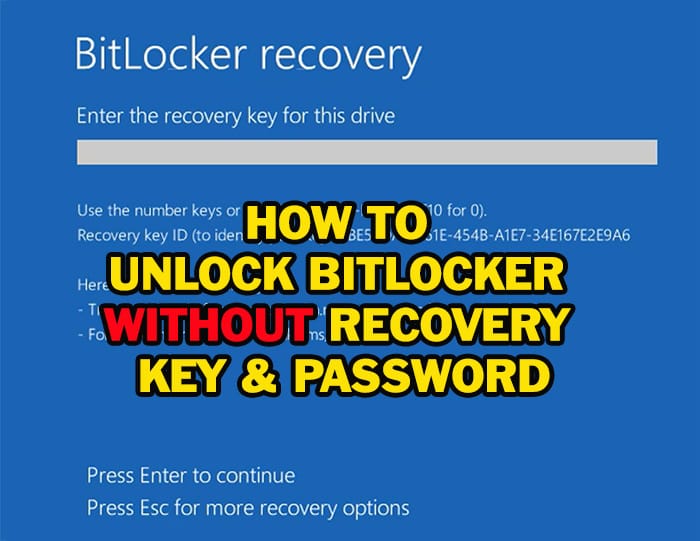
As we are accustomed to providing you with exclusive topics on the ValiumMedia Tech website, today you will learn how to get BitLocker unlocked without password and recovery key in windows 10 and windows 11 laptops.
NOTE: If you have an access to the Microsoft account linked to your computer or if you have the BitLocker Recovery key stored in a USB drive or anywhere, then you can use the key to unlock the BitLocker encrypted partition easily as instructed on this topic. But if you are unable to obtain the BitLocker Recovery key, then try the ValiumMedia Tech suggestions on this topic to bypass the BitLocker blue screen without recovery key or password.
- What cause the computer to ask for BitLocker recovery key?
- First Part: How to Disable BitLocker in BIOS on Windows 11 & Windows 10?
- Second Part: How to Unlock BitLocker Drive Using Data Recovery Agent Certificate?
- Third Part: How to Bypass BitLocker Recovery Key from Windows Recovery Environment?
- Fourth Part: How to Fix BitLocker Screen Related to Hardware Changes?
- Fifth Part: How to Format the BitLocker Encrypted Partition and Reinstall Windows?
- VIDEO:
What cause the computer to ask for BitLocker recovery key?
I will show you many EXCLUSIVE suggestions so you can try the one that is applicable to your situation according to the error source in your laptop, or you can try all suggestions one by one if not sure what is the source of error. But before showing the suggestions, you have to carefully read the following list, which contains the most common changes that trigger BitLocker recovery screen.
a. By passable Changes or BitLocker triggers
- The following BitLocker triggers can be bypassed without BitLocker password and Recovery Key:
- Disabling secure boot or TPM in BIOS settings
- Changing the BIOS boot order on TPM 1.2 devices, or removing a CD or DVD if their order was before the hard drive on TPM 2.0 devices
- Booting into advanced recovery options from a bootable media or due to system failure
- Upgrading BIOS, UEFI or TPM firmware
- Adding or removing some hardware or upgrading the motherboard
- Changing the master boot record or the boot manager on the disk
- Adding, removing or upgrading firmware of add-in cards (such as video or network cards)
If the BitLocker recovery triggered by on of the previous changes in your computer, then you have to revert those changes back in order to bypass BitLocker without password or recovery key.
___________________________________________________________
b. Non By-passable Changes or BitLocker triggers
- The following list of BitLocker triggers can’t be bypassed without recovery key, Data Recovery Agent (DRA):
- Updating or upgrading windows but in rare cases
- Removing, inserting, or completely depleting a smart battery charge on a laptop computer
- Failing to boot from a network drive
- Changing the NTFS partition table or disk scheme
- Entering the PIN incorrectly too many times
- Clearing the TPM data
- Detecting a hacker attack
If the BitLocker triggered by one of the previous changes in your computer, then you have to format your windows partition in order to unlock BitLocker without Recovery Key or password.
First Part: How to Disable BitLocker in BIOS on Windows 11 & Windows 10?
1- Enabling Secure Boot and Trusted Platform Module (TPM):
- If the Secure boot and or Trusted Platform Module (TPM) were disabled manually or automatically after BIOS or windows updates, then you have to enable them in order to unlock BitLocker without password or recovery key as followings:
- Press Esc key to show additional recovery options
- Press Esc again to open UEFI or BIOS settings
- Also you can open BIOS settings by pressing the F2 key repeatedly after powering on the computer
- This is the list of the most common keys to open BIOS menu for different PCs:
- From Security tab, enable Secure boot option.
- In Asus and other laptops with American Megatrend BIOS utility, click on Advanced mode and then navigate to Security tab to enable the Secure boot.
- If the TPM is disabled in your computer, then you have to enable it in order to bypass the BitLocker without password and Recovery key.
- Notice that the TPM configuration may take another name in some computers, for example, it may be named PTT in some Intel motherboards, or fTPM in some AMD motherboards.
- In Lenovo and other laptops with BIOS settings similar to this, the TPM can be turned on by changing the Security Chip to Enabled under Security tab.
- After enabling the TPM click Apply icon or press F10 key from keyboard to save new changes.
___________________________________________________________
2- Disabling Boot and Pre-Boot Support for External Storages and Network Stack:
- If you have a Dell or another laptop with BIOS similar to Dell BIOS Utility, you have to disable the boot and pre-boot support for external and network cards as followings:
- Navigate to System Configuration and then select USB Configuration
- Disable Boot Support option
- Navigate to Thunderbolt Configuration or TBT and disable Thunderbolt boot support and Thunderbolt Pre-boot Modules, after that, change Security level to No security option.
- Also, disable any option to support USB Type-C boot or Pre-boot
- Navigate to Miscellaneous Devices and disable Secure Digital SD Card Boot
- Navigate to POST Behavior and then change Fastboot to Thorough
- Click on Apply icon to save new changes.
3- Downgrading BIOS firmware:
NOTE: Usually, downgrading BIOS or EFI firmware is not recommended, however, if you have a 100 % confidence that the recent BIOS update leads to BitLocker recovery screen and you can’t find the BitLocker key, then you can try to downgrade the BIOS firmware to earlier version if your laptop supports this operation.
Disclaimer: you have to do this at your own risk, as this step may brick your computer, especially when installing a wrong firmware.
- To downgrade your BIOS firmware, do the followings:
- See If there is an option to allow BIOS downgrade in your computer and enable it
- Then search for the correct BIOS firmware from the official manufacturer website using the service tag or Model number of your computer.
- Locate the old version of BIOS firmware file that you think is the installed version before appearance of BitLocker Recovery Screen.
- Make sure to download the file that can be installed using a USB drive and then copy it into a USB drive formatted in NTFS file system.
- After that, open the USB drive from BIOS and then open the BIOS update file to start downgrading process.
- For more details about updating BIOS firmware from USB, read this topic for ASUS and similar laptops, or watch this video if you have Lenovo or similar laptops.
In some laptops, there is an option for BIOS firmware auto recovery. If this option enabled in your computer, then you can restore your BIOS firmware to previous state.
Second Part: How to Unlock BitLocker Drive Using Data Recovery Agent Certificate?
If your computer belongs to a company group domain, then you can bypass BitLocker Recovery screen without recovery key through a Data Recovery Agent (DRA). The DRA can use his certificate to unlock the drive without BitLocker password or recovery key. But for DRA to be able to remove the BitLocker protection, he should install a Data Recovery Agent certificate into the problematic computer previously.
This method is used by maintenance employees in companies. The maintenance employee creates an Encrypting File System or EFS Data Recovery Agent certificate, then installs it on all of the company’s computers, so that he can decrypt any file or drive in the future using that certificate if one of the company employees leaves, or if the recovery key is forgotten or lost.
- To unlock the BitLocker encrypted drive using DRA certificate, do the followings:
- Connect the locked system drive into another computer in which the DRA is installed
- Search for CMD and then run Command Prompt as administrator
- Type this command to show the details of locked partition:
- MANAGE-BDE -PROTECTORS -GET E:
- If there is a certificate thumbprint Code, then the DRA was installed on the encrypted partition, so you can unlock it using this command followed by the thumbprint code:
- MANAGE-BDE -UNLOCK E: -CERT -CT
Third Part: How to Bypass BitLocker Recovery Key from Windows Recovery Environment?
1. Rebuilding the BCD:
If the Boot Configuration Data or BCD file is corrupted or contains errors in your computer, then windows can’t boot normally into login screen. Instead, the system will try to boot into automatic repair menu in order to repair startup failure. Booting into advanced recovery option will trigger the BitLocker to ask you for recovery key to unlock encrypted drive. This scenario is true for other sources of boot failure as well.
- To bypass the BitLocker without entering the recovery key, you have to rebuild the BCD as followings:
- Press Esc key to open the advanced recovery options
- You may need to press F1 to boot into Advanced Recovery menu.
- If your computer boot into Your PC/Device Needs to be repaired blue screen, that mean your recovery is disabled, so you have to create a bootable USB in your mobile or in another computer, after that, boot from that bootable USB into Advanced recovery options.
- Click on Skip this Drive to continue
- Click on Troubleshoot option and then select Advanced options
- Open the Command prompt and click on Skip this Drive if you asked to do so
- Type the following commands to rebuild BCD:
- BOOTSECT /NT60 SYS
- BOOTREC /FIXMBR
- BOOTREC /FIXBOOT
- BOOTREC /REBUILDBCD
- Close CMD window and then click on Continue to restart system into login screen.
If the boot failure was related to BCD corruption, the computer will boot into login screen normally after rebuilding the BCD. However, if there is a severe system failure, then you have to format your windows partition and then reinstall a fresh copy of windows as instructed on the fifth part, because you can’t repair your system while the windows partition is locked.
2. Changing the Boot Menu Policy:
You can also try to change Boot Menu Policy according to your system as followings.- If you have Windows Server, execute this command:
- BCDEDIT /SET {DEFAULT} BOOTMENUPOLICY LEGACY
- In Windows 10 or windows 11, execute this command:
- BCDEDIT /SET {DEFAULT} BOOTMENUPOLICY STANDARD
- If you have Windows Server, execute this command:
Fourth Part: How to Fix BitLocker Screen Related to Hardware Changes?
If the new hardware upgrade leads to BitLocker recovery screen, then you have to disconnect that
If you noticed that the BitLocker recovery screen appeared after adding or replacing a new hardware, then you have to revert the new hardware change back and then boot your computer into desktop screen. After that, export the BitLocker recovery key into a USB drive or another external storage, or disable the BitLocker protection. Now, install the new hardware part, and then use exported BitLocker key to unlock encrypted drive.
Also if you have any external storge like DVD, USB drive or SD card, then you have to disconnect this storage media before starting your computer.
Fifth Part: How to Format the BitLocker Encrypted Partition and Reinstall Windows?
If all previous suggestions failed to unlock your system partition and you can’t obtain the recovery key, then the only solution for you is to format the locked partition and then reinstall a fresh copy of windows.
If you decided to proceed with this suggestion, you have to create a bootable USB of windows 10 or windows 11 image in another computer or in your mobile.
- Once the Bootable USB is ready, connect it to your computer and power the computer on
- Press ESC key to open Advanced Recovery menu.
- Click on Skip this device option and then select Use a Device option.
- Select the EFI USB Device option to boot from it.
- If the EFI USB Device not shown, you have to enable the USB boot support and to disable the Secure
- Boot from BIOS settings in order to boot from the USB.
- Select the ISO file of windows and press Enter
- Select Boot in Normal Mode and press Enter
- Press any key to continue
- Select the desired language and then click Next
- Click on Install button and follow on-screen instructions
- Press Shift + F10 from keyboard to open a CMD window
- Type BCDEDIT and press enter to identify windows partition
- In my laptop, the C is the windows partition
- Execute the following commands to determine the size of windows partition:
- DISKPART
- LIST VOL
- Back to installation wizard and select windows partition based on its total size.
- Notice that the Setup Wizard stated that Windows cannot be installed to this hard disk space. Because the BitLocker Device Encryption is Enabled on the selected Partition.
- Click on Delete option and then Click Ok to confirm the deletion
Disclaimer: This step will erase everything inside windows partition permanently, however, the data and files inside other partitions will not be lost.
- Select the Unallocated Space and click on New option
- Click on apply to recreate the deleted partition
- Select the new partition if not selected and then click Next to start windows installation process.
- Follow Wizard instructions to customize windows installation in your computer.
Read this topic to see how to install and customize windows 11 OS, or watch this video to see how to install and customize windows 10 OS.
VIDEO:
For illustrated details about unlocking BitLocker Recovery without password and recovery key, watch this video: