Are you experiencing sound issues with your Windows 10 or Windows 11 PC? Whether you encounter the dreaded “No Audio Output Device Installed”, or other sound-related issues, this guide lists several step-by-step solutions to restore your audio quickly and efficiently.
The subject is broken into five segments with various trouble shooting techniques, ordered from rudimentary to advanced. Be sure to follow them in order, though, as skipping steps may render some fixes unavailable. Before we get into the more advanced techniques, let’s start with the basics.
Section 1: Basic Checks and Tweaks
Let us start with some very basic checks that most of the time can solve the issue before coming up with any complex to implement solution.
Enable the Audio Device
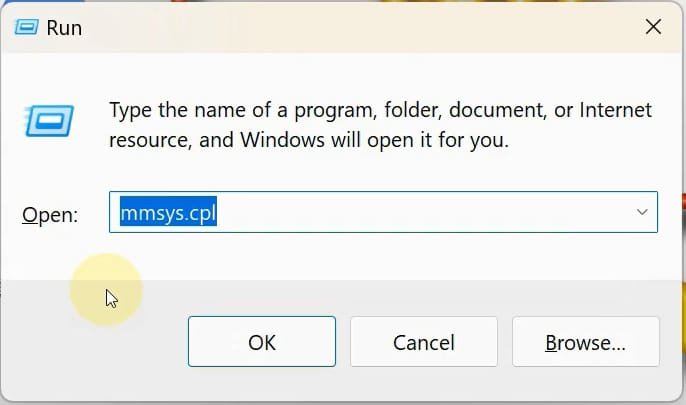
- Press Windows + R to open the Run window.
- Type mmsys.cpl and press Enter to open the Sound settings.
- Make sure your audio device is clicked. If it’s disabled, then right-click and enable it.

Enable Audio Services
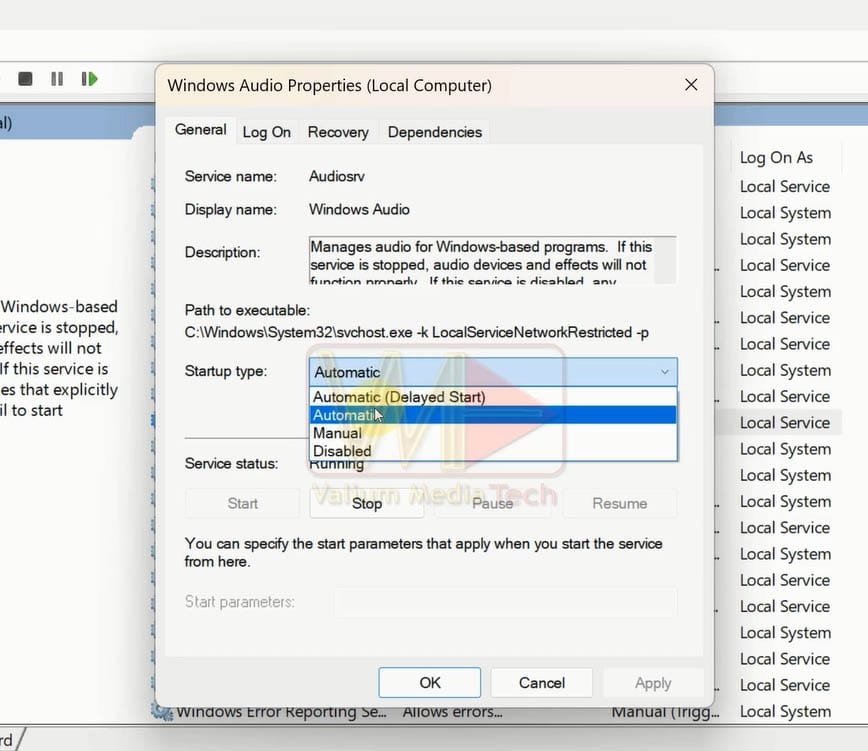
- Press Windows + R keys from keyboard, type services.msc, and then hit Enter.
- Find Windows Audio and Windows Audio Endpoint Builder.
- Right-click each service, then click All Tasks > Start (or Restart).
- Set the Startup type to Automatic to allow these services to run each time your computer boots.

Restart Your Computer
- If you’ve recently updated your audio driver or altered audio settings, a restart can sometimes fix the problem.

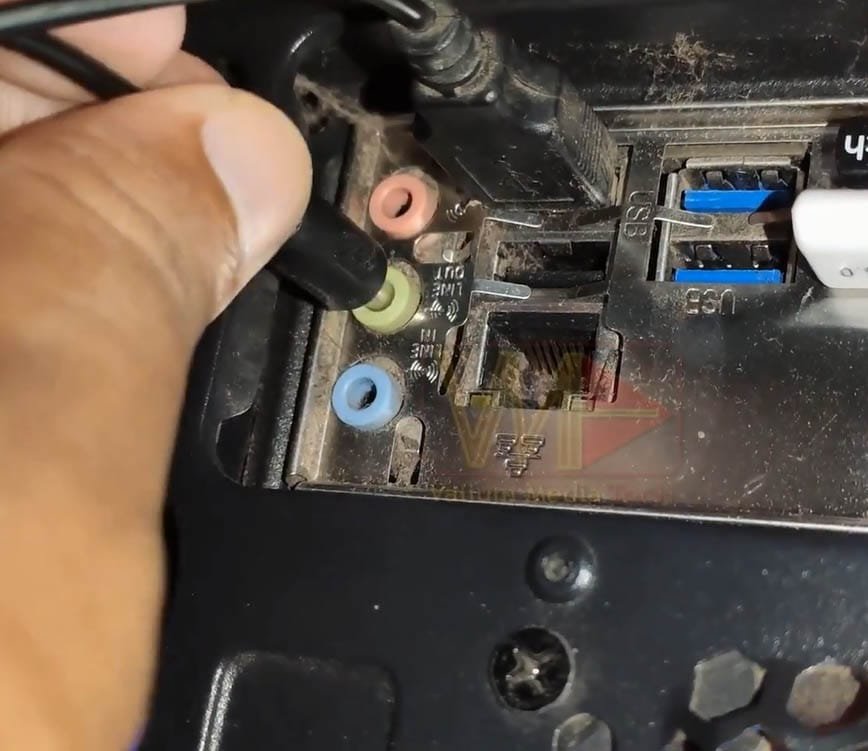
Check Audio Connections
- If you are using external speakers or headphones, make sure they are hooked up correctly. If need be, attempt another port or gadget.
Section 2: Managing Audio Drivers
Driver issues and the like are a common cause of audio problems. Here’s how to address them.
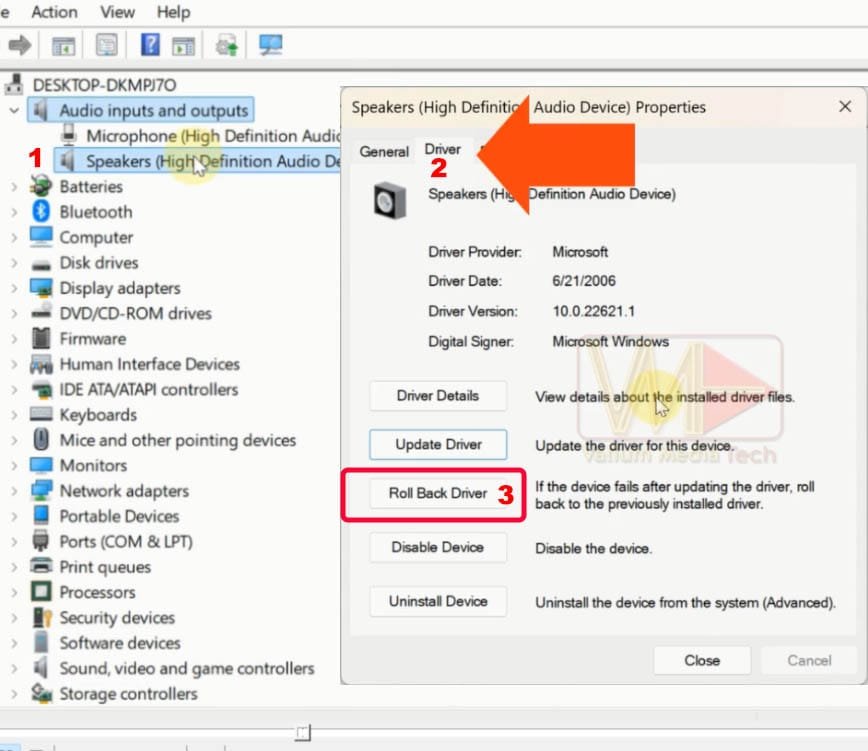
Roll Back Audio Drivers
- Select Device Manager by right-clicking the Start icon.
- Expand Audio inputs and outputs or Sound, video and game controllers.
- If you can’t find your audio device, or you see a yellow warning sign next to it, double-click on it to launch its properties.
- Use the Roll Back Driver option, if available, to return to an earlier version.
Install Windows Default Audio Driver
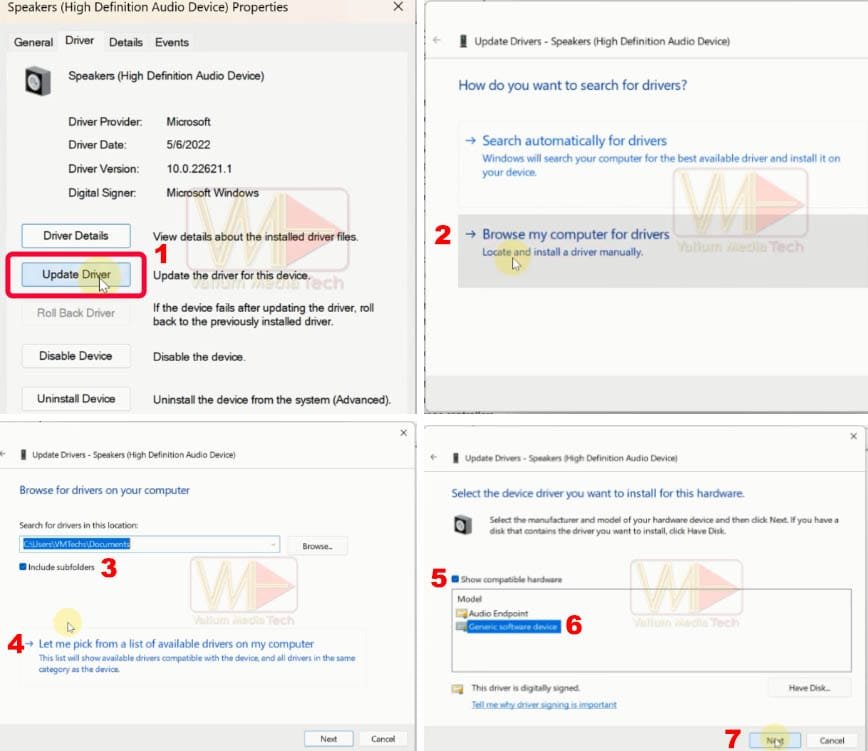
- Open Device Manager, double-click your Audio device, and navigate to the Driver tab.
- Select Update Driver, then Browse my computer for drivers.
- Select Let me pick from a list of available drivers, and then click on a generic or compatible driver.
Let Windows Install the Audio Driver
- If the update above did not work, double-click Realtek High Definition Audio device,
- On driver tab select Uninstall device and tick “Delete Driver software” option if prompted.
- Follow the same steps to uninstall Intel Smart Sound Technology Driver or any audio related drivers. Restart your PC.
- It will reinstall the audio driver automatically.
If the issue didn’t solved proceed to the next steps for reinstalling the official driver.
Install the Correct Audio Driver
- Go to the official website of your computer manufacturer and enter the serial number of your device, or click Detect my Device option from the website.
- Locate the appropriate audio driver of your OS and then download it into your computer
- Run the installer and follow the on-screen instructions.
- The installation will be complete after you restart your computer.
Section 3: Updating BIOS Firmware
Audio issues, especially after upgrading your operating system can be caused by outdated BIOS firmware.
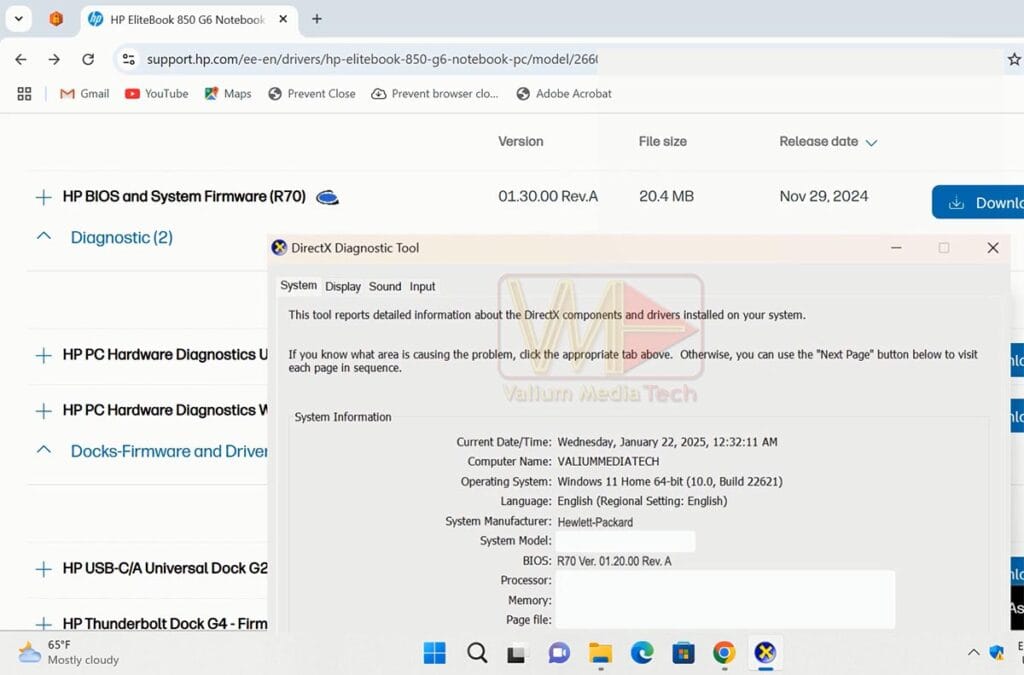
Verify Your BIOS Version
- Then press Windows + R to open the Run dialog, type DXDIAG, and press Enter.
- Check if the current version of BIOS installed matches the most recent one listed on your manufacturer’s site.
Update BIOS Firmware
- Download the BIOS update from the manufacturer’s website.
- Execute the update file to read the guide and follow the steps onscreen.
- This process involves your computer rebooting several times.

Important Notes:
- Do not forget to disable BitLocker encryption prior to the BIOS update.
- Do not shut down or restart your computer until the update has finished.
- For more details about updating BIOS, read this topic for HP laptops, or this topic for Asus or similar laptops.
Section 4: Enabling Audio in BIOS Settings
In some rare cases, the audio controller might be disabled in the BIOS settings.
Access BIOS Settings
- Press and hold the Shift key and restart your computer.
- Go to Troubleshoot > Advanced options > UEFI Firmware Settings and click Restart.
Enable Audio Controller
- Find the audio controller or similar options in the BIOS menu.
- If it’s disabled, turn it on and save and exit.

Section 5: Additional Suggestions
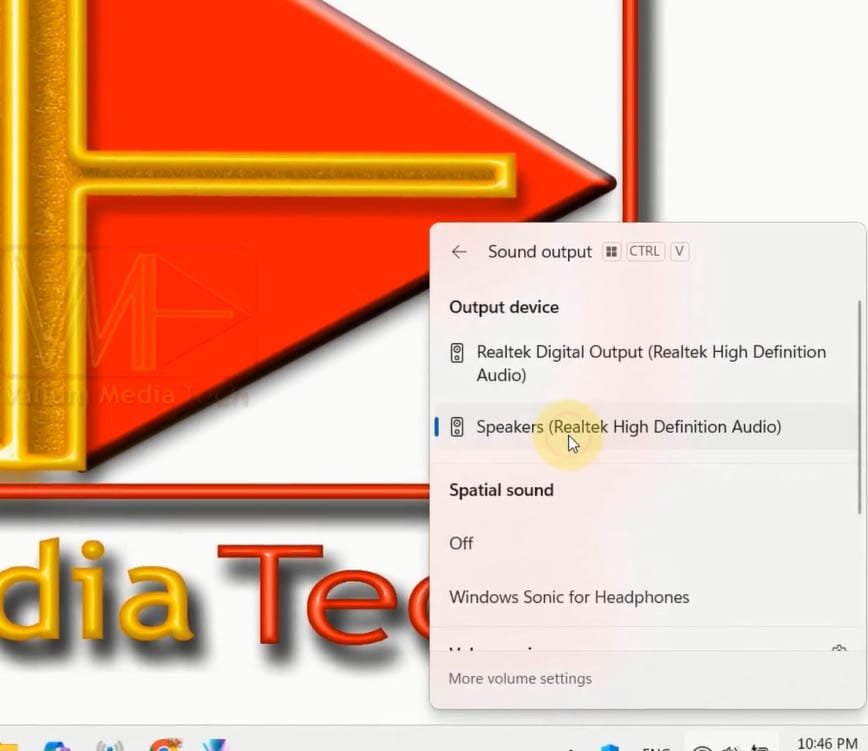
Choose the Correct Output Device
- If you have multiple output devices, make sure the right one is selected. The name of the built-in audio device is typically something like Speakers (Realtek High Definition Audio).
Run OEM Diagnostic Tools
- Where to get the tool: Download and install from your computer manufacturer.
- Perform a hardware scan to detect any audio-related problems.
- Download diagnostic tool for various computer manufacturers. Open one of the following links for your computer brand:

Conclusion
If you do everything mentioned above, you should be able to fix the “No Audio Output Device Installed” error and other sound problems in your Windows 10 or Windows 11 PC. If one of these solutions worked for you, comment down below! Make sure to share this guide and subscribe for more tech tips and fixing tutorials.
Thanks for reading, and good luck troubleshooting! happy troubleshooting!
Video
For illustrated tutorial about how to fix all audio issues on windows computers, watch this video: